
Shred the Secrets Ending 3: Whistleblower Walkthrough (Vault Puzzle, August 2026)
Shred the Secrets Ending 3 walkthrough: Room 9 attic, Mad Scientist quest and the Room 12 vault — no fixed code, notes give the order. Full screenshots inside.
On this page
Quick answer: how do you get Ending 3?
Ending 3 is the Whistleblower ending, added in the [ENDING 3] update (July 30, 2026). If you came for the vault code: there is no fixed code for the Room 12 vault — the orange notes around the room give each turn's order (number) and direction (arrow), and the combination changes every run. The run itself now spans 12 rooms — push past Room 8, then:
- In Room 9, find the ladder parts and repair the broken ladder to open the attic.
- Meet the Mad Scientist in the attic and take his quest: recover his blueprints. Completing it awards Industrial Revolution (3.4% of players).
- Clear through the Room 10 testing lab and Room 11 (Mesa Corp) to Room 12.
- Solve the bank vault dial — 4 turns; the room's note gives each turn's order (number) and direction (arrow). There is no fixed vault code: the combination changes every run.
- The vault opens, the Whistleblower (Ending 3) badge drops (4.9% of players), and the whiteboard reveal plays.
You can earn it solo — the source run below was a 1 hour 13 minute solo clear.
Sources
Every step deep-links to the exact second in the source footage. Thanks to these creators:
- Mediastic — Shred the Secrets: Ending 3 + New Rooms! (full Ending 3 route: ladder, attic, Scientist quest, lab, vault, overview screen — every screenshot on this page)
- Phantom — How to Get Ending 3 (Whistleblower Ending) (cross-checked the vault combination rule: number = order, arrow = direction)
- InterndotBlox — I Shredded EVERY Paper in Roblox Shred the Secrets (August 2026 current-version footage: crowbar spot, coffee machine, vault dial UI and the combination-changes-every-run check)
How to get into the attic
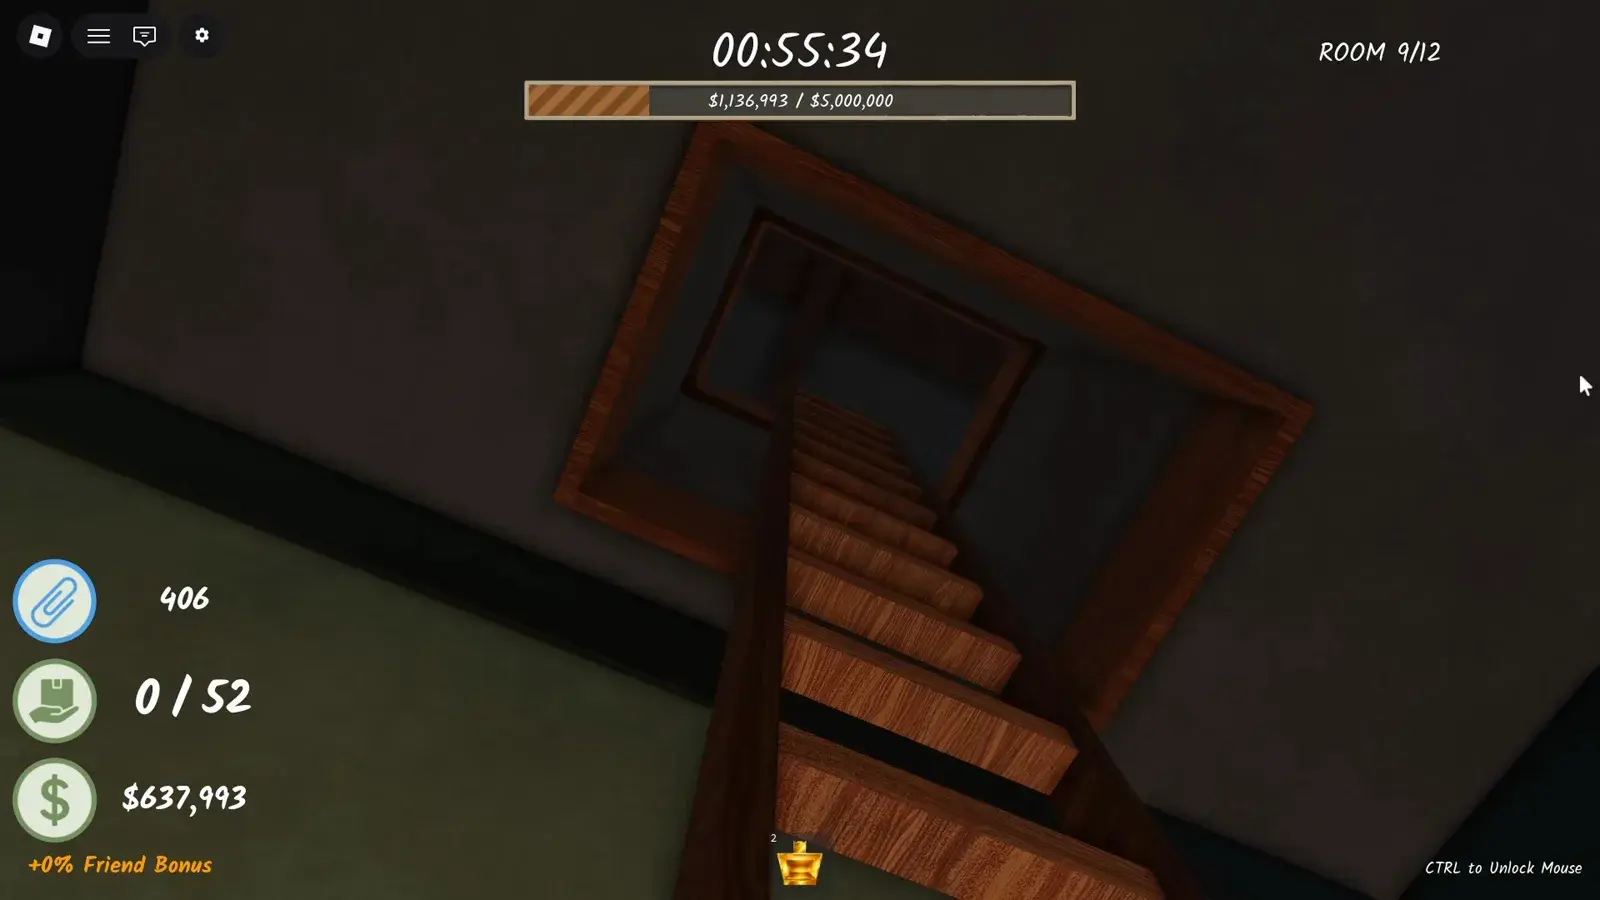
The attic is the Room 9 secret on the Ending 3 route — there is no separate door to find; you build the way in. Room 9 is the green-lit room with the yellow catwalk, and a broken ladder hangs above it. Collect the missing ladder parts scattered around the room, interact with the ladder to repair it, and the game announces "The attic has been opened." Climb up and the Mad Scientist (PROJECT: CAFFEINE) is waiting with his blueprint quest. That is the whole trick — find parts, repair, climb — and both recorded runs needed nothing more.
Watch at 27:26
Room 12 vault puzzle
The bank vault dial in Room 12 is the final gate to the Whistleblower ending. Interact with the door to start the minigame (TURN 1/4 through TURN 4/4; SPACE backs out). The room's note encodes the combination — each number is the order of a turn, and its arrow is the direction. Open the vault to earn the Whistleblower (Ending 3) badge (4.9% of players). Step-by-step screenshots below.
There is no fixed vault code. The combination is written on the orange notes around Room 12, and it changes every run — two August 2026 recordings show different combinations. Read the notes in your room, then enter the four turns in the order the numbers give, turning in each arrow's direction. If you lose count, SPACE backs out and you can start over.
Watch at 36:23
Watch at 36:34
Ending 3 walkthrough — "Whistleblower"
- 1
Push into the new rooms (Room 8 and beyond)
The [ENDING 3] update extends the run to 12 rooms. Ending 3 content starts at Room 8 — the floor is taped off with WARNING markings and the money goal climbs to $5,000,000 per room. Keep the usual loop going and clear a path forward.
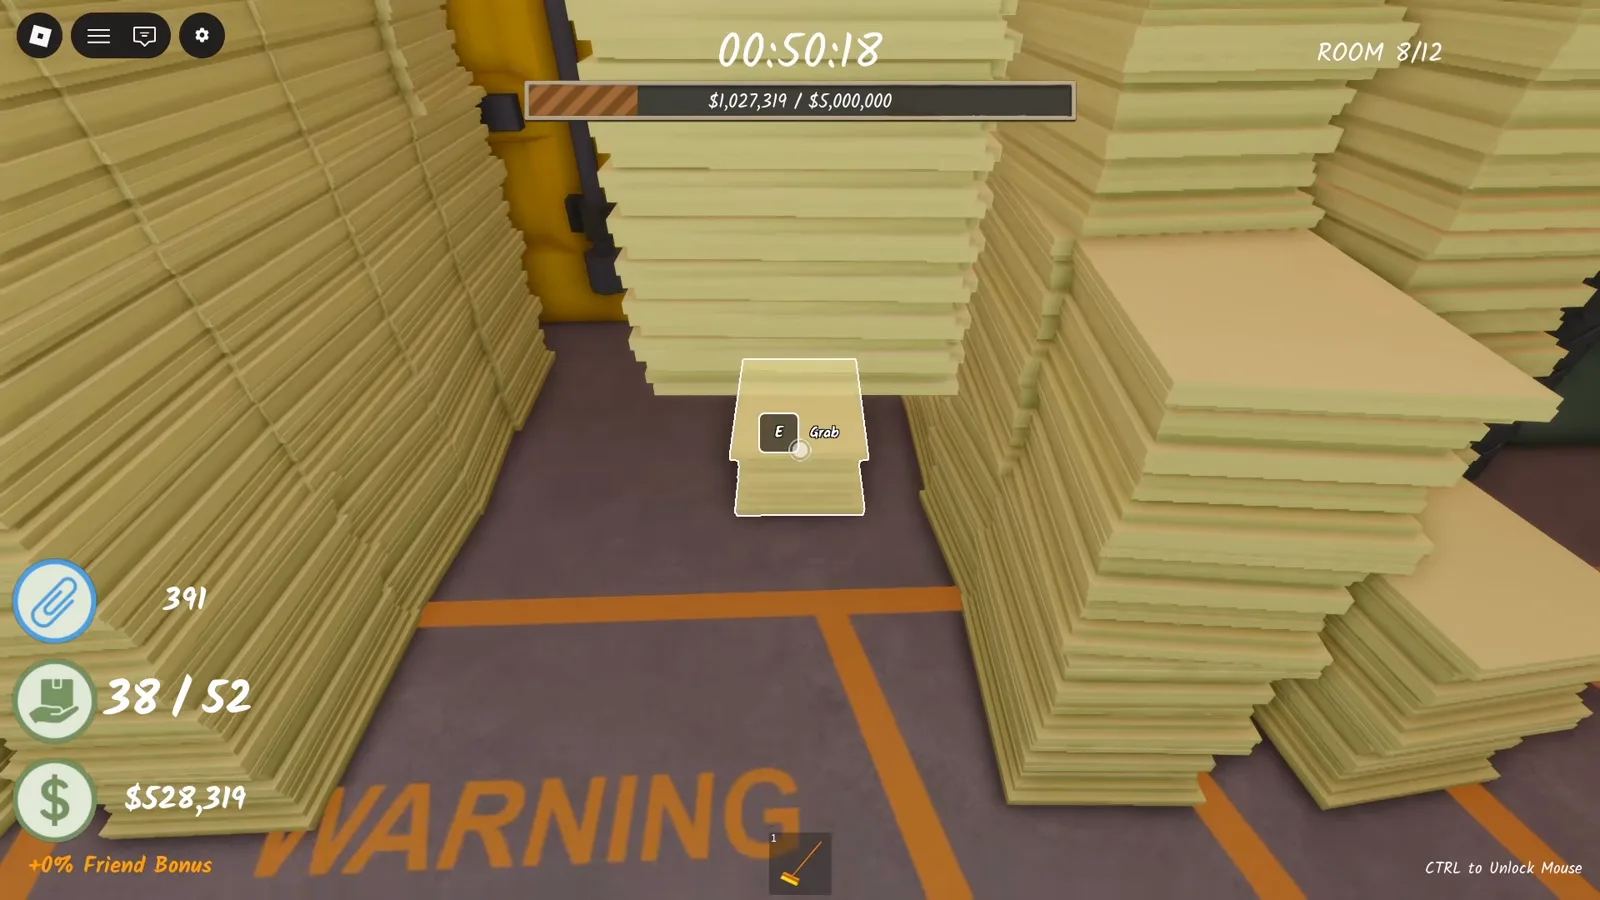
Room 8 of 12 — the WARNING floor is where the new content starts.Watch at 0:27 - 2
Clear Room 9 and look up: the broken ladder
Room 9 is the green-lit room with the yellow catwalk. Above it sits a broken ladder — the game nudges you with "I can easily fix this ladder, right?" Find the missing ladder parts scattered around the room and repair it.
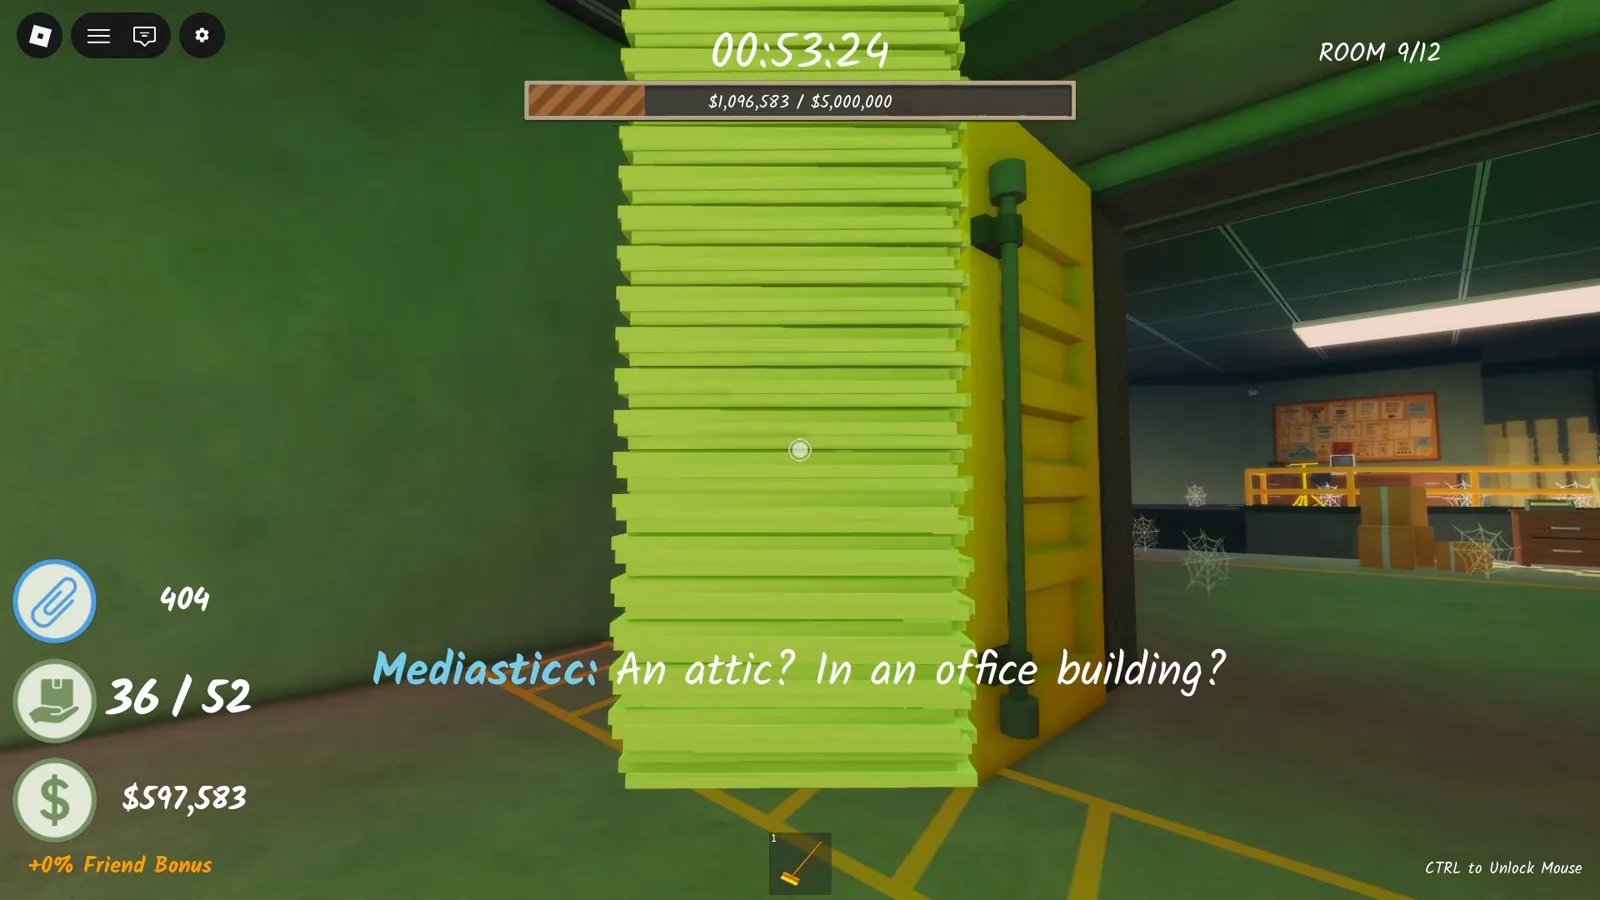
Room 9: green lights, yellow catwalk — and a broken ladder above.Watch at 1:00 - 3
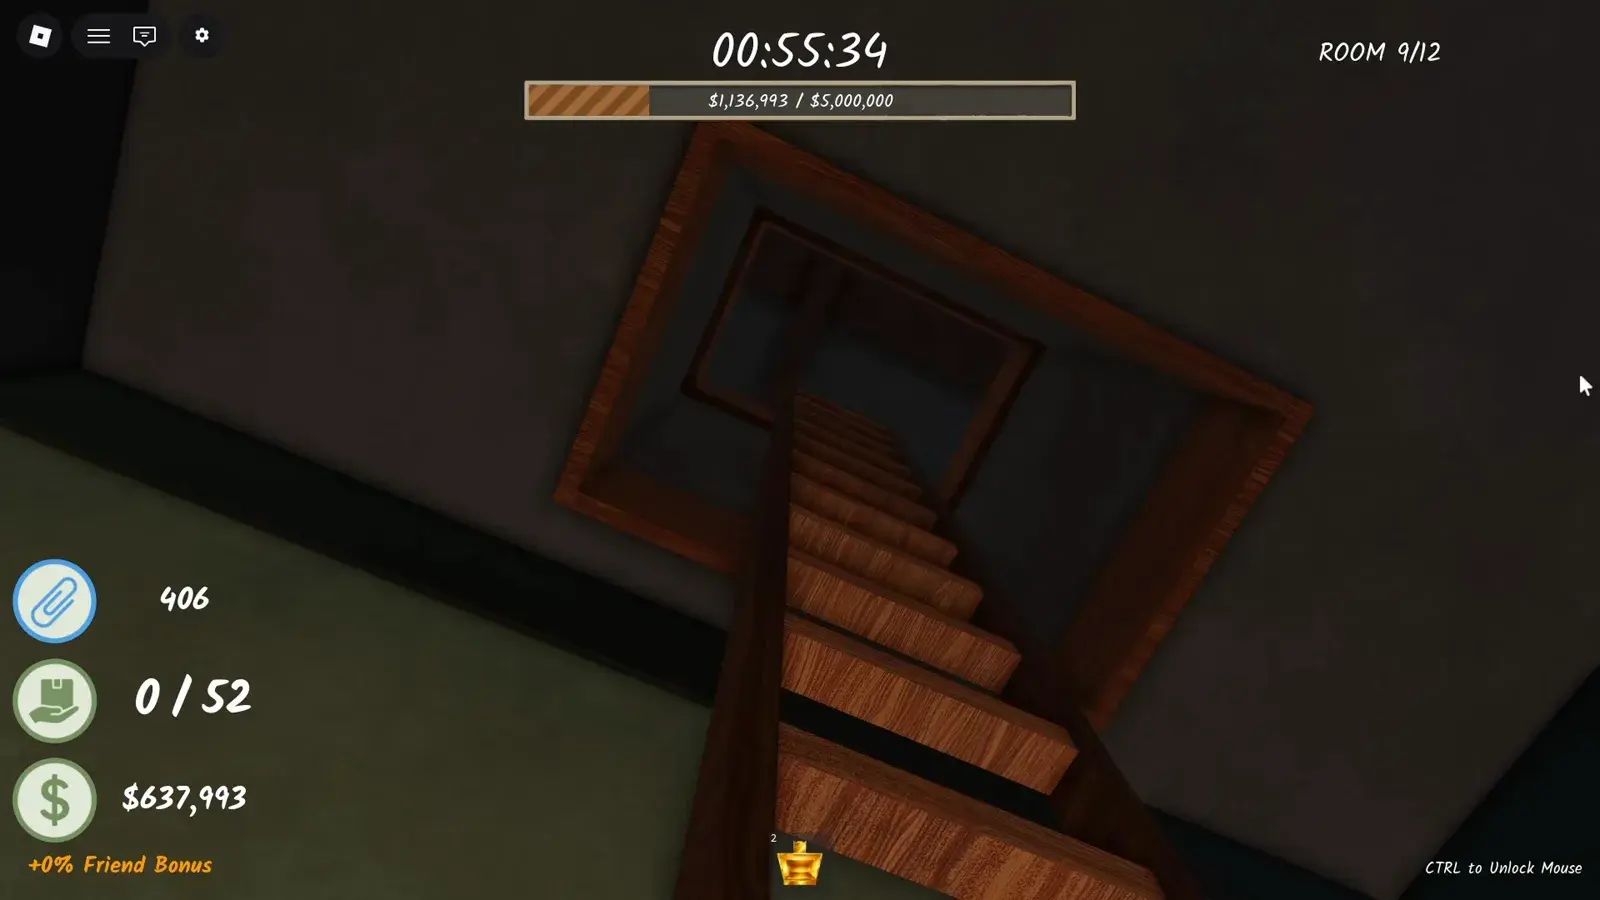
Repair the ladder to open the attic
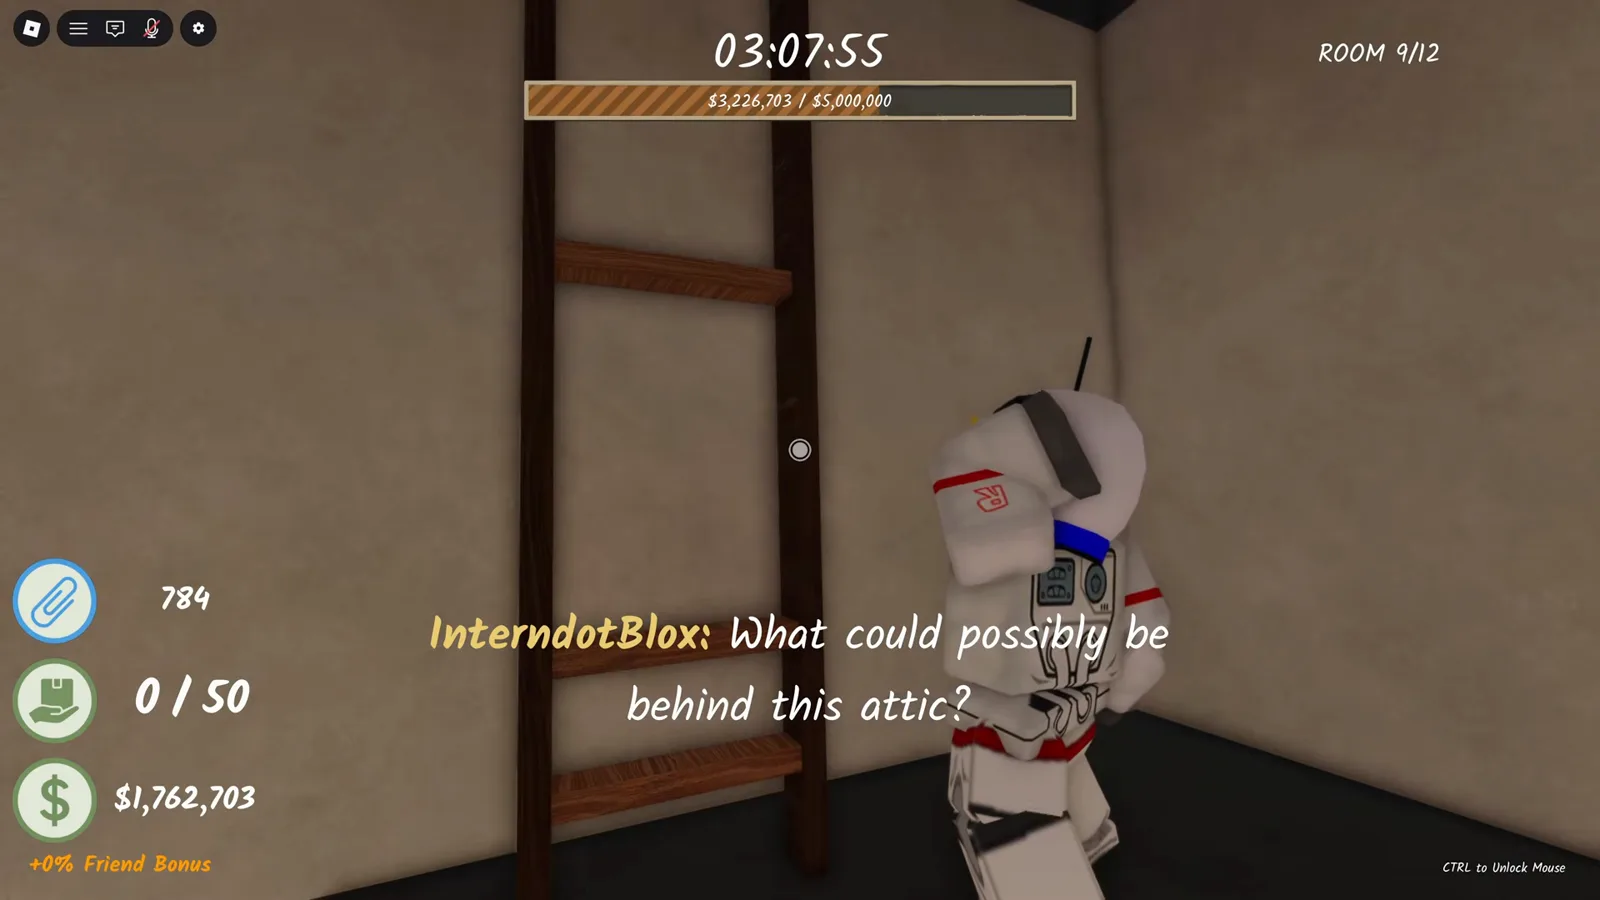
With the parts collected, the ladder is fixed and the game announces "The attic has been opened." Climb up — your character wonders out loud what could possibly be behind this attic.
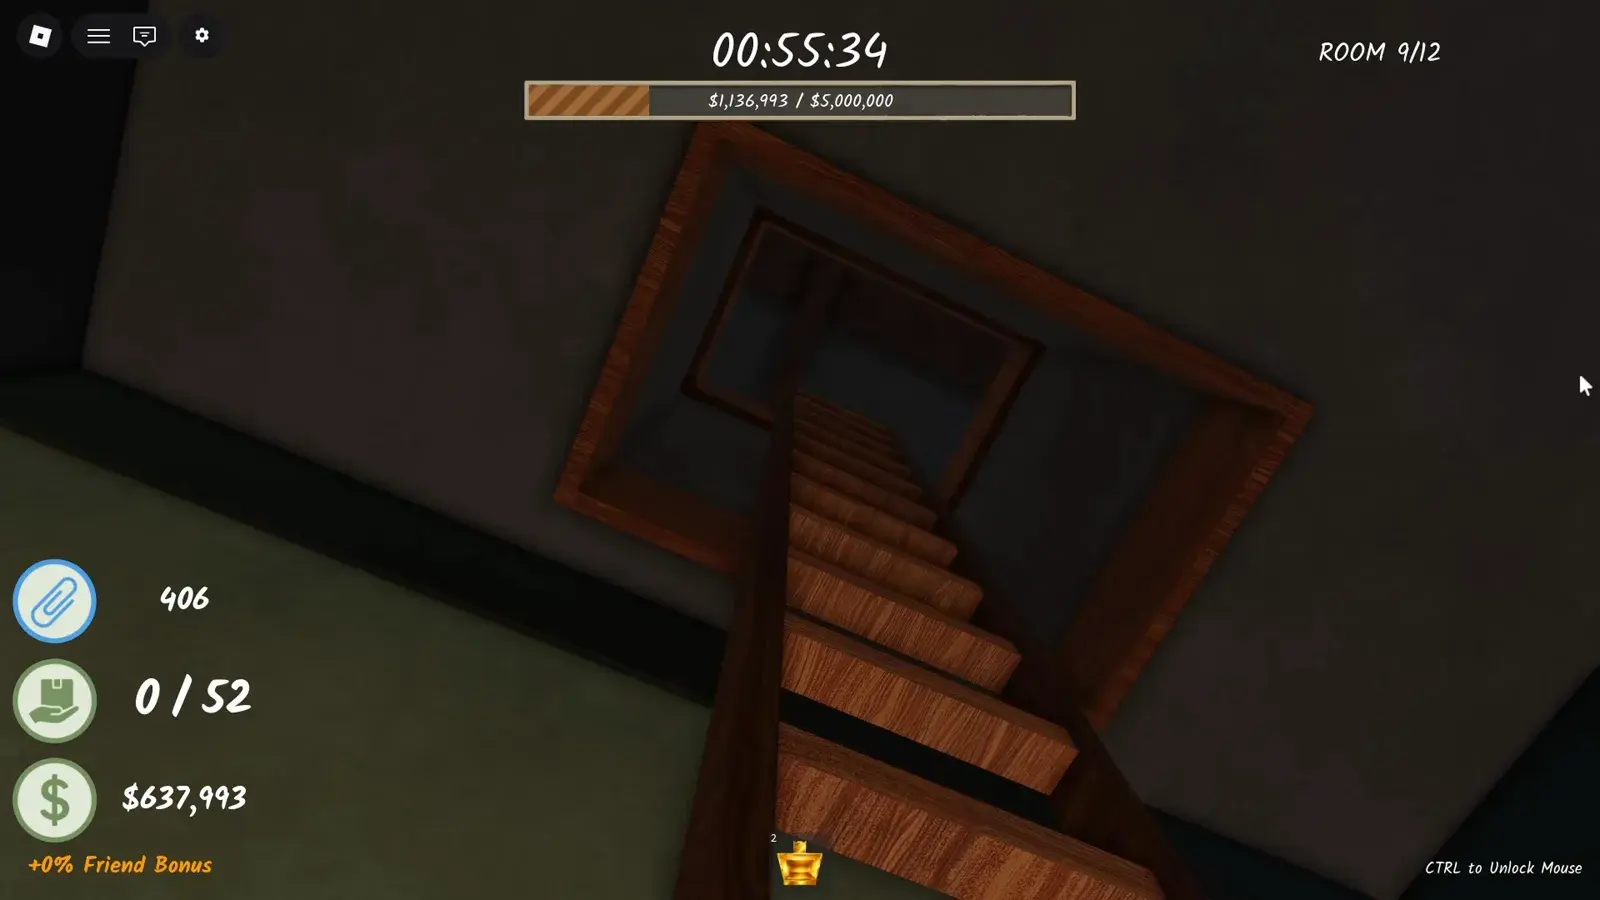
Fix the ladder, and the attic opens.Watch at 1:40 - 4
Meet the Mad Scientist in the attic
The attic hides an NPC in a lab coat — the Scientist. His chalkboard reads PROJECT: CAFFEINE, and he greets you with "Wait — you're not one of them." Talk to him to start his quest.
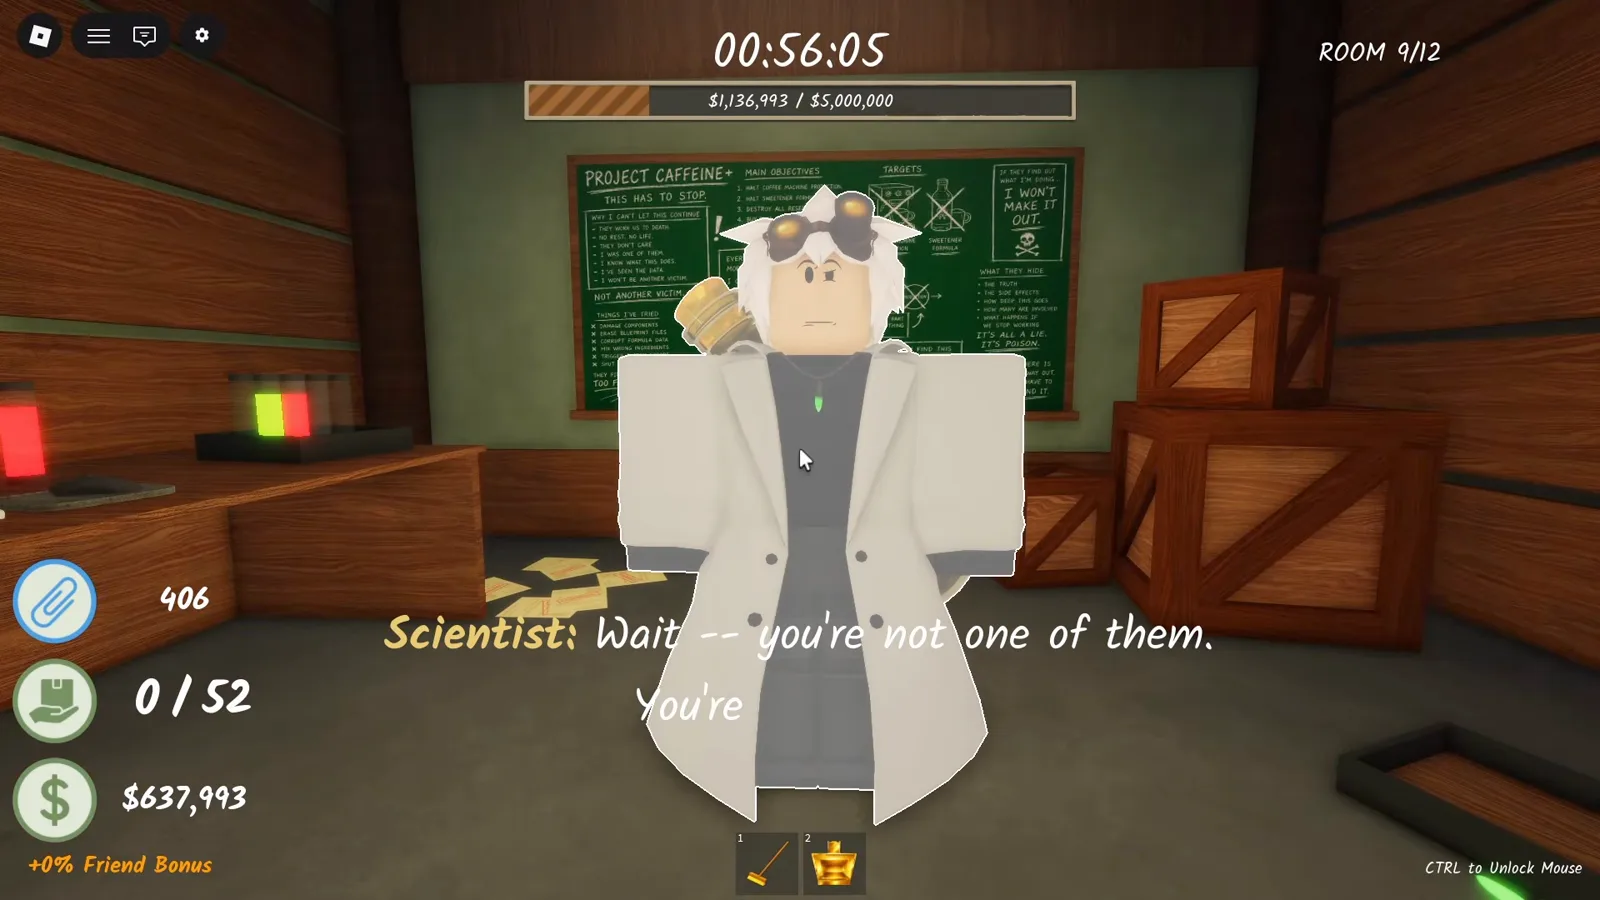
The Scientist, hiding in the attic under his PROJECT: CAFFEINE board.Watch at 2:22 - 5
Peek at the failed coffee prototypes
The Scientist's chalkboard is the attic's lore payload: FAILED COFFEE MACHINE PROTOTYPES, with every sketch crossed out — FAILED, UNSTABLE, TOO COMPLEX, LEAKS. It is the backstory of the sweetener plot your run keeps uncovering, and a joke at the office's expense.
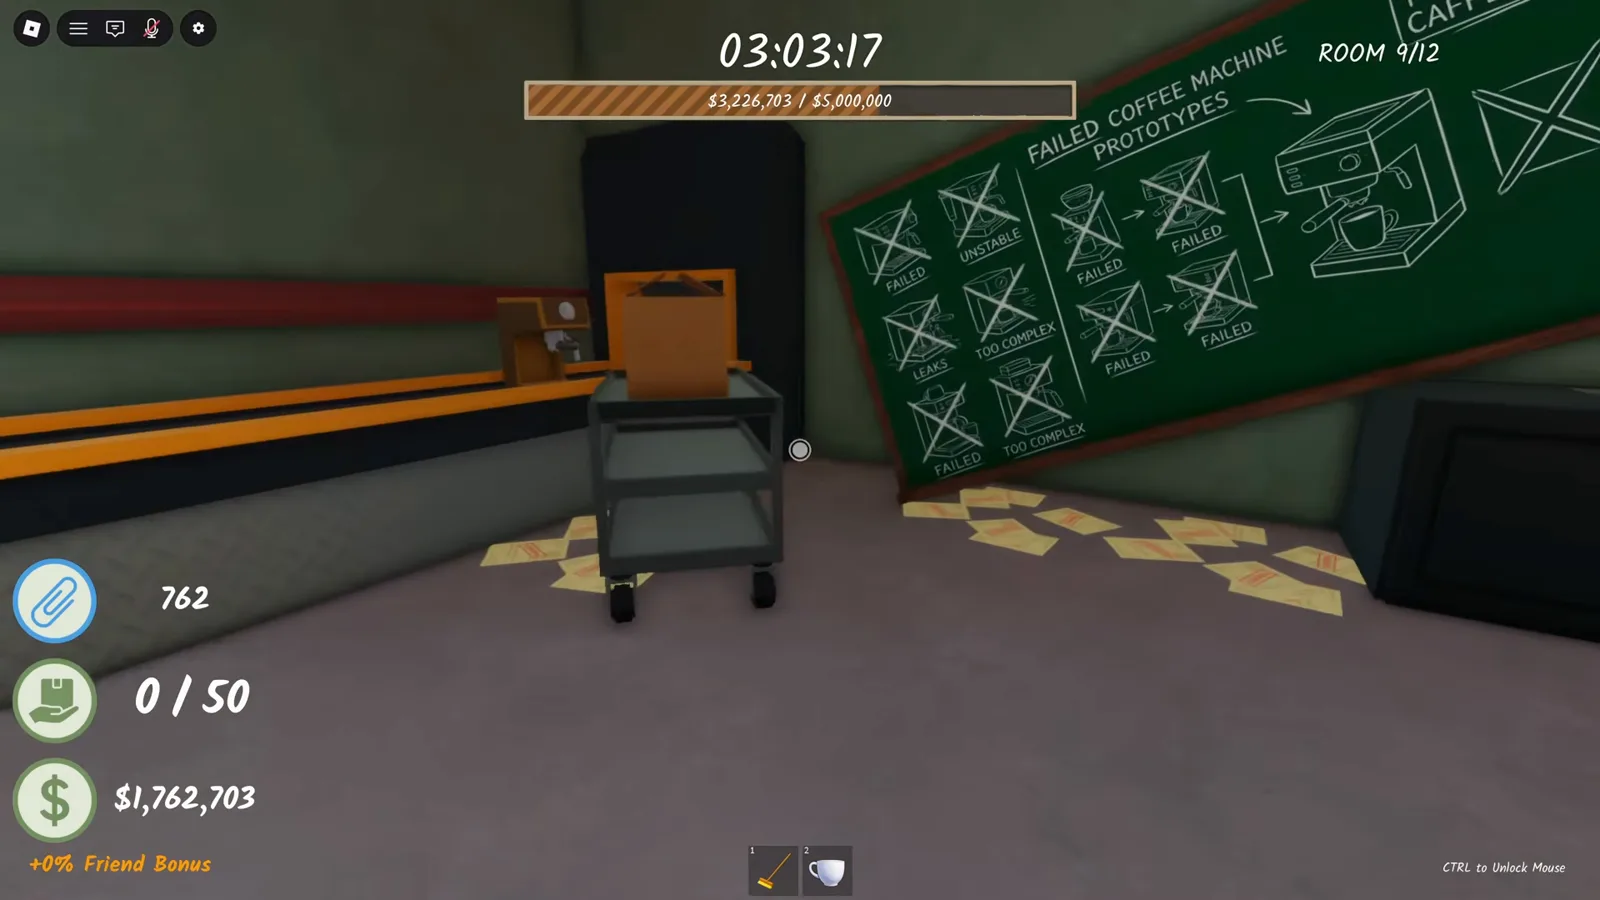
PROJECT: CAFFEINE went through some failed prototypes.Watch at 26:43 - 6
Take the quest: recover the Scientist's blueprints
The Scientist explains he helped make the sweetener in the coffee downstairs, tried to stop it, and got found out. He can undo it — but you must recover his blueprints, "vital parts of the machine," from the floors below. Finishing his quest awards the Industrial Revolution badge (earned by 3.4% of players).
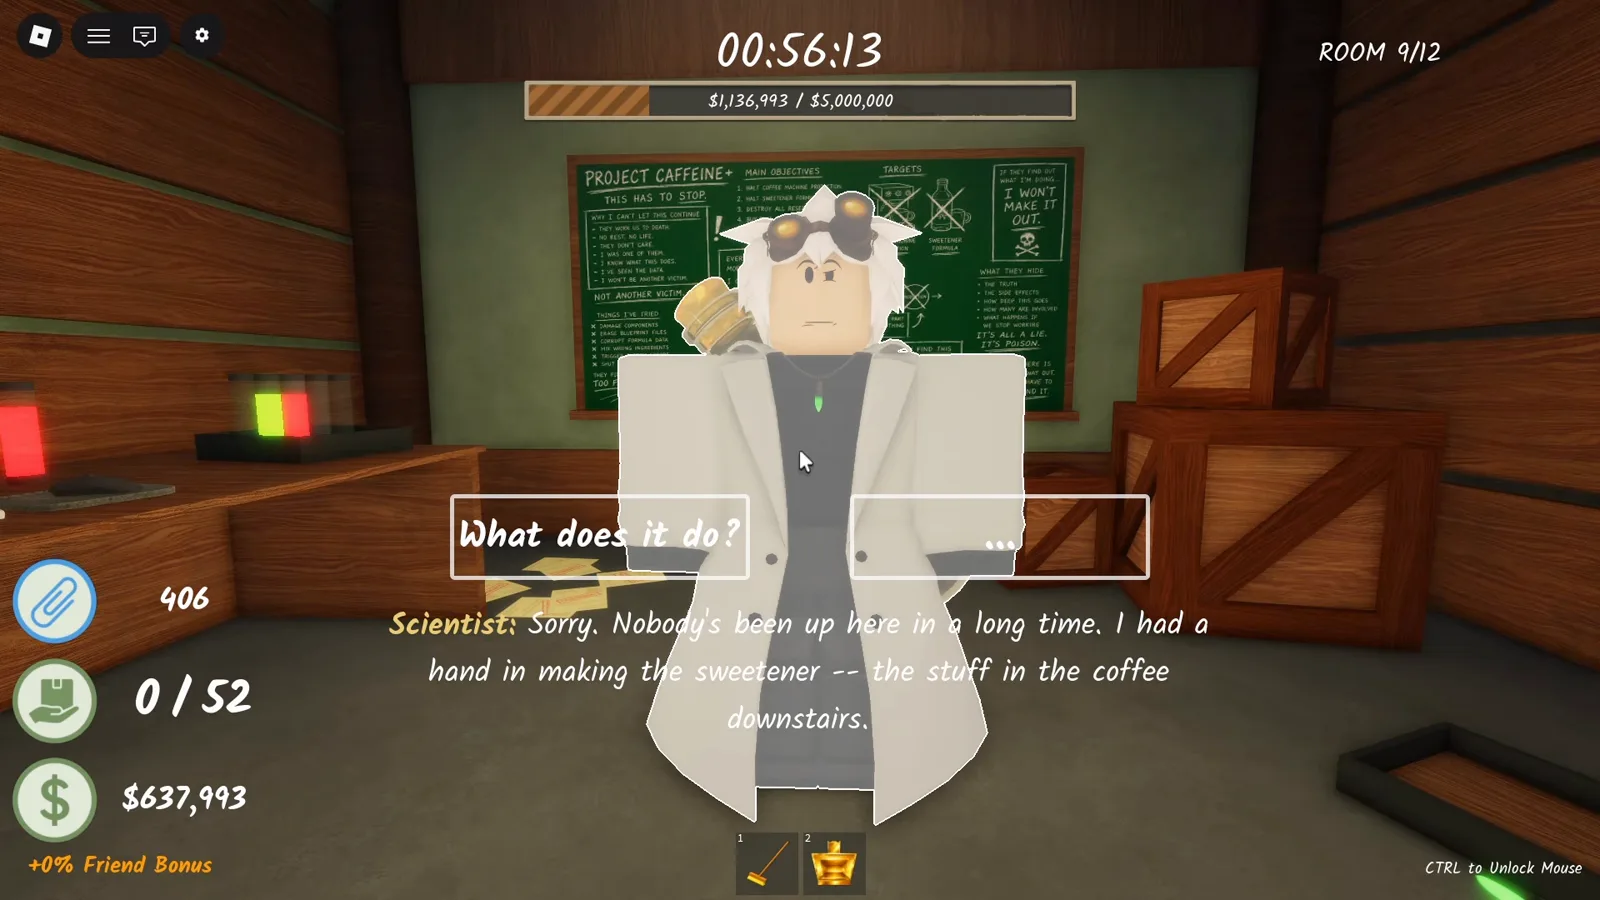
His quest: bring back the blueprints — vital parts of the machine.Watch at 2:30 - 7
Push through the Room 10 testing lab
Room 10 is the dark lab with red alarm lights and rows of orange chairs — your character mutters "This must be the human testing lab…" Keep clearing paper; the Golden Shredder's 2x cash, 6 stacks, no cranking pays for the $5M goals fast.
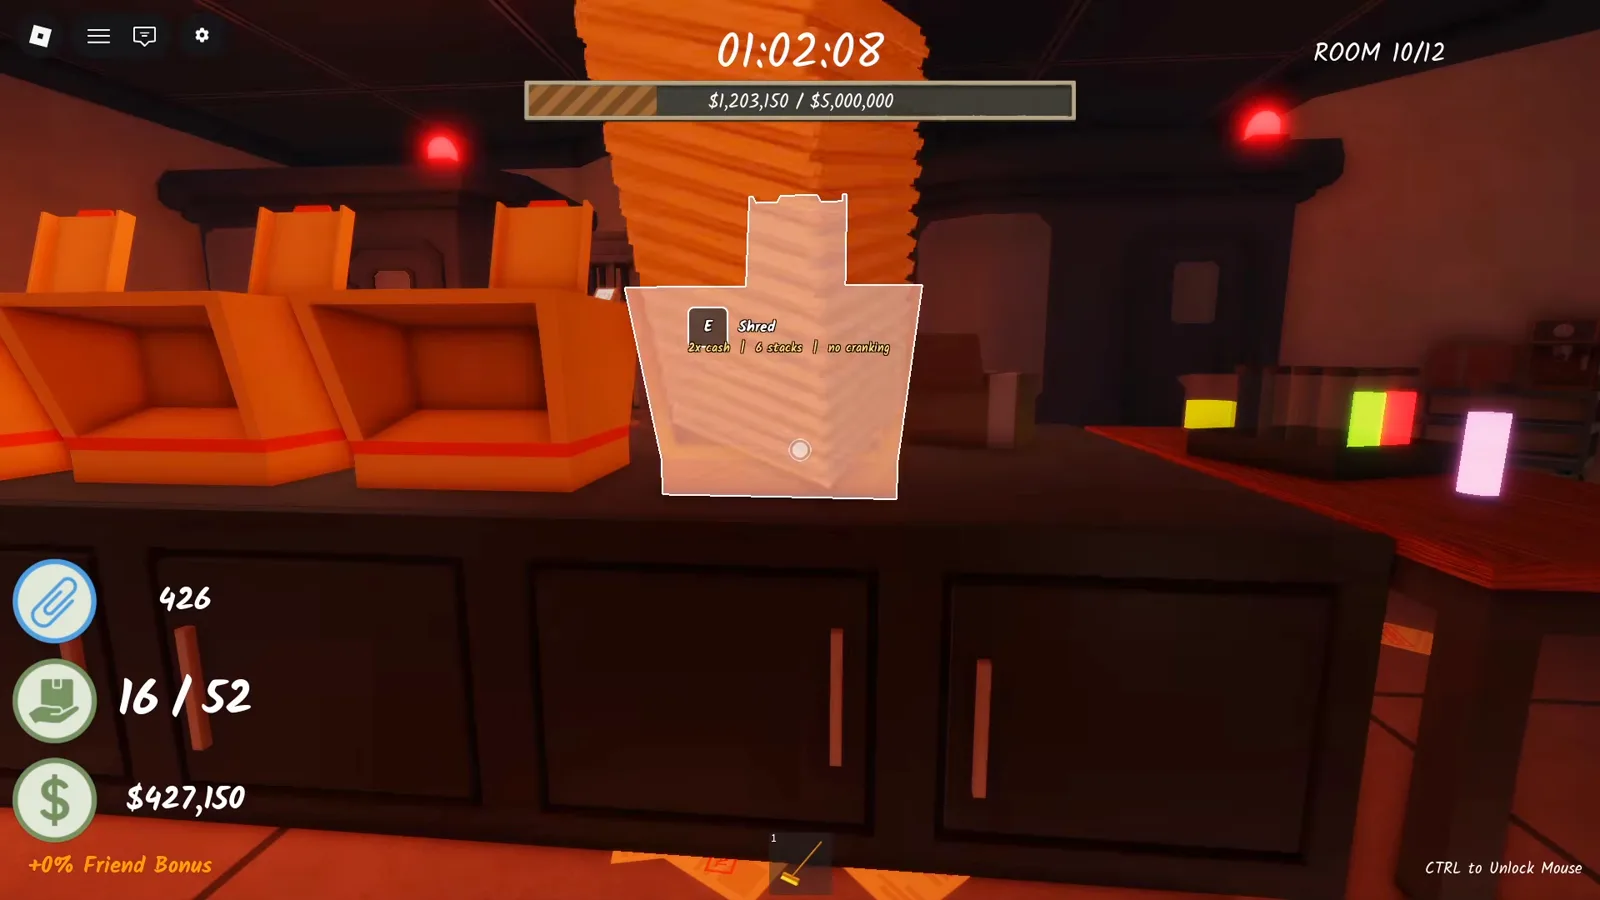
Room 10: red alarms, orange chairs — the human testing lab.Watch at 5:07 - 8
Walk into Mesa Corp (Room 11)
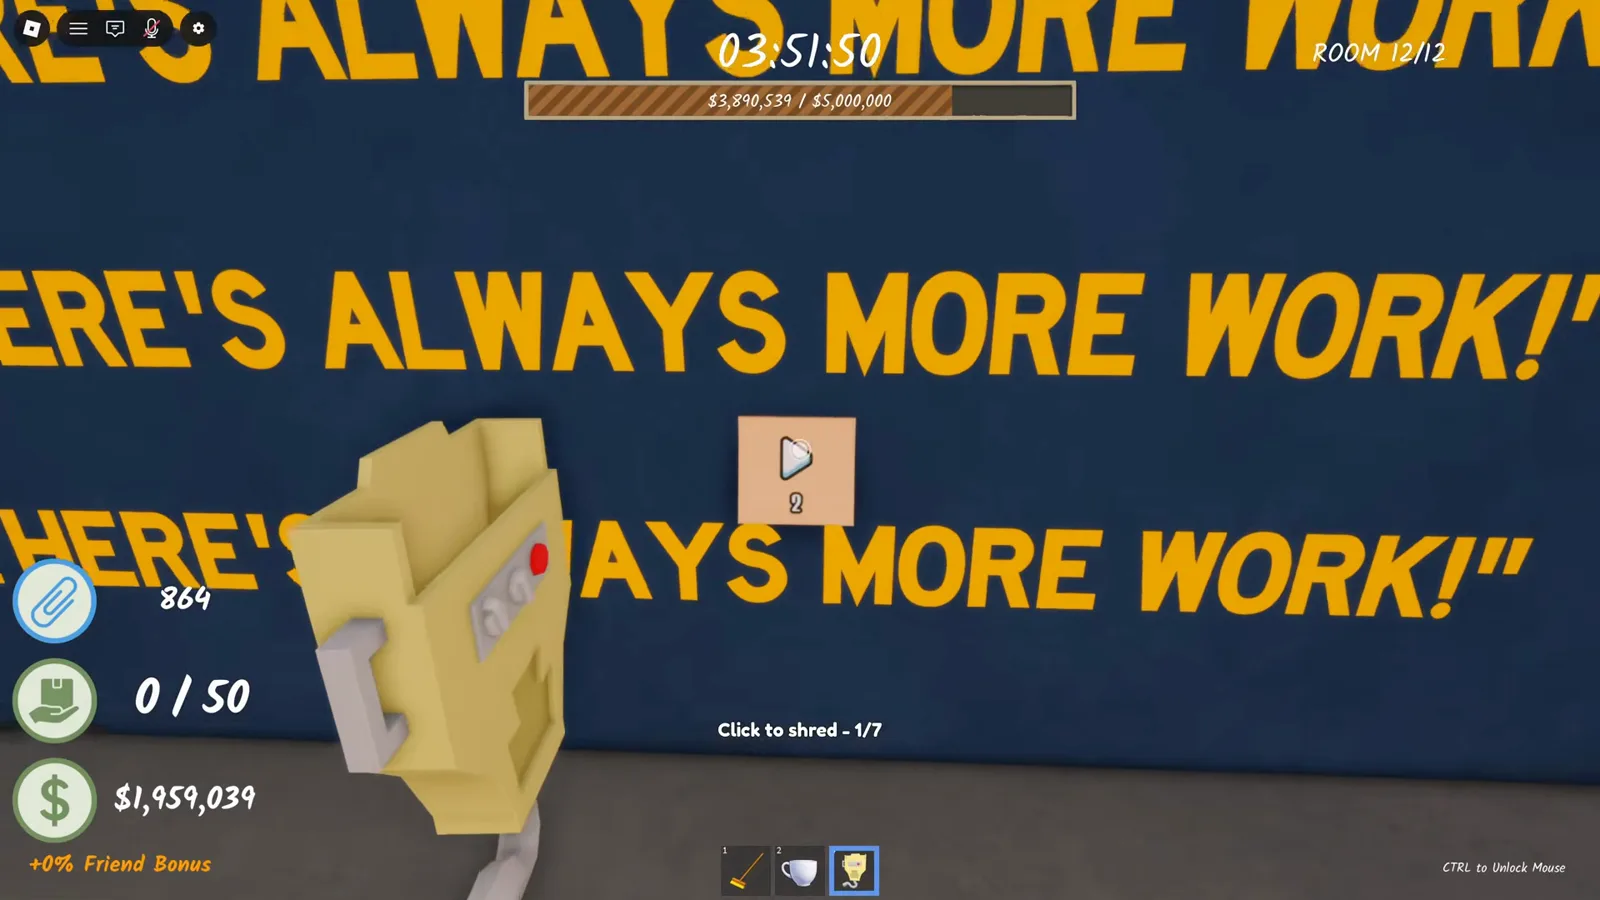
Room 11 drops the act: the wall logo reads MESA CORP — "THERE'S ALWAYS MORE WORK!" Your character realizes out loud: "Mesa Corporation..? I thought I was working for an accounting firm!"
Room 11: the company has a name — Mesa Corp.Watch at 6:57 - 9
Reach Room 12 and find the bank vault
The final room hides a bank vault door behind the paper stacks — "the conveniently placed bank vault door seems like it can be opened." Clear the paper in front of it and walk up to the dial.
Room 12: a bank vault, conveniently placed.Watch at 7:02 - 10
Solve the vault dial — 4 turns, order and direction
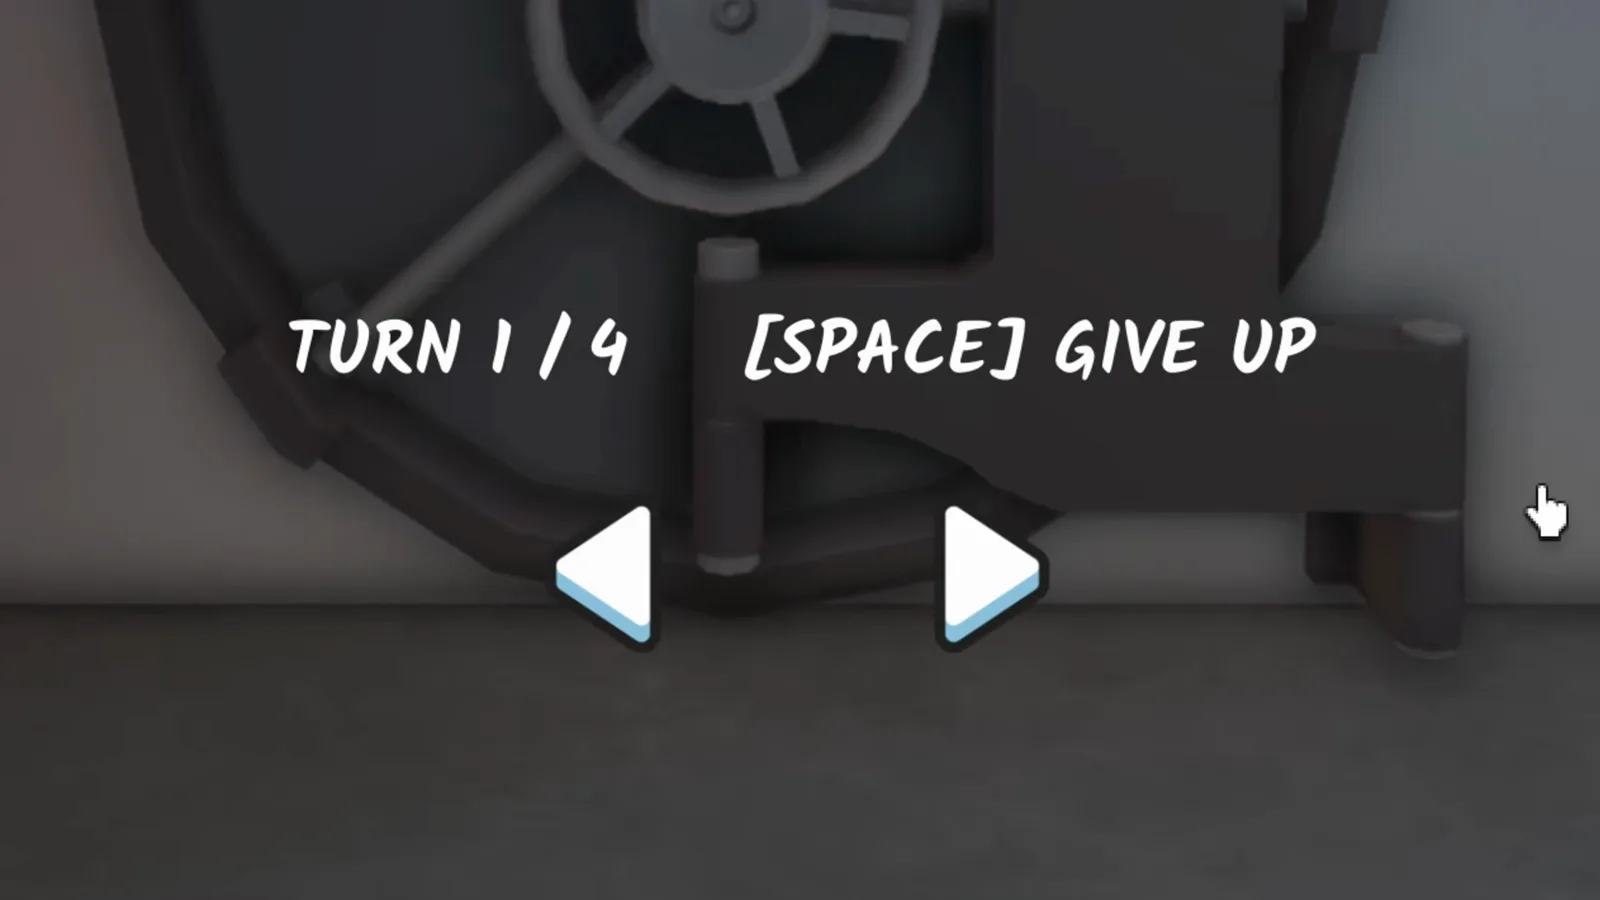
Interact with the vault to start the dial minigame: TURN 1/4 up to TURN 4/4, with SPACE to give up. The room's note encodes the combination — each number gives the order of the turn, and its arrow points the direction to turn. Enter all four turns and the vault swings open.
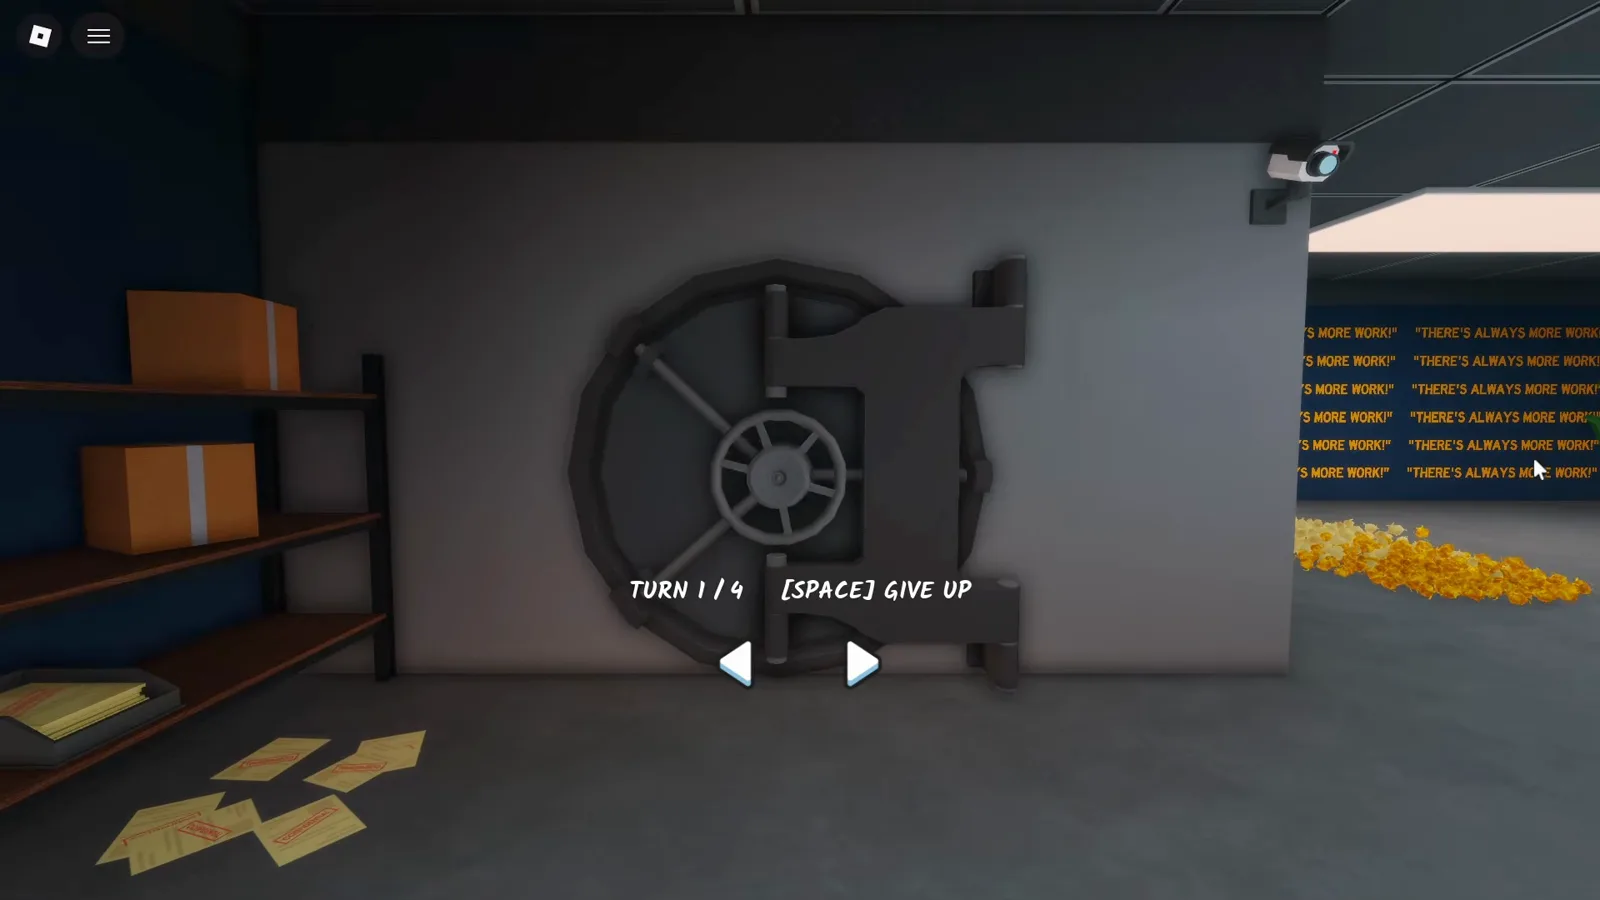
TURN 1/4: number = order, arrow = direction. Four turns total.Watch at 8:05 - 11
Vault open — the Whistleblower badge is yours
The moment the vault opens, the Badge Awarded popup lands: "Whistleblower (Ending 3)" — earned by only 4.9% of players. Inside: deposit-box walls and mountains of cash.
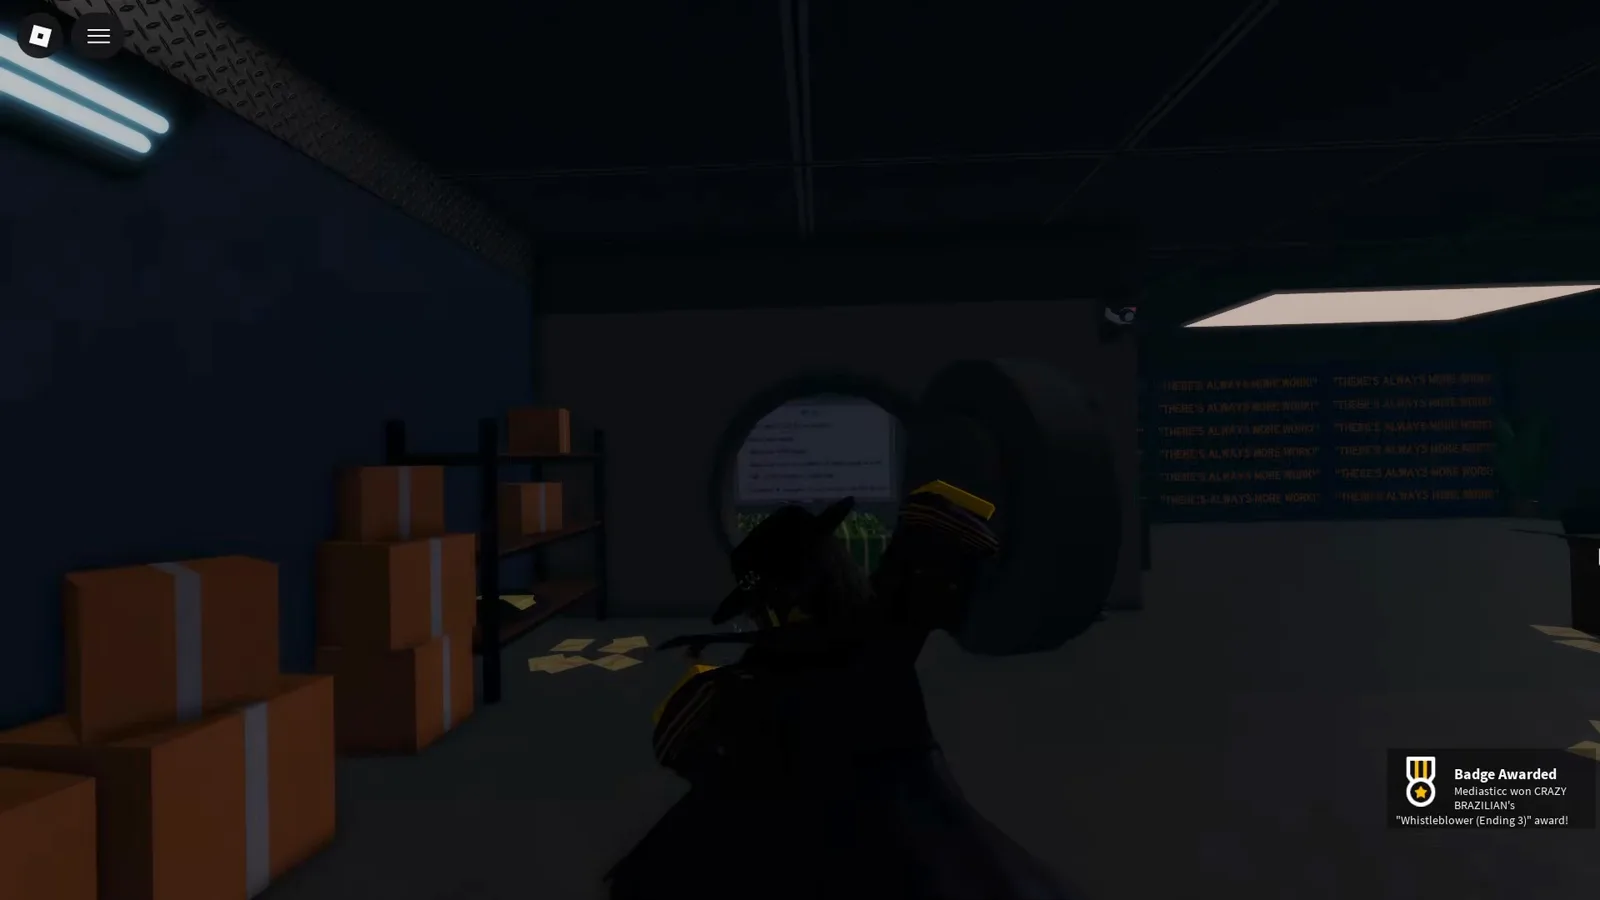
Badge Awarded: Whistleblower (Ending 3).Watch at 9:00 - 12
Step inside: deposit boxes and stacks of cash
Past the open vault door sit walls of PO-box-style deposit drawers and mountains of cash — the fortune Mesa Corp protects by shredding documents. Take it in, then turn to the whiteboard for the final reveal.
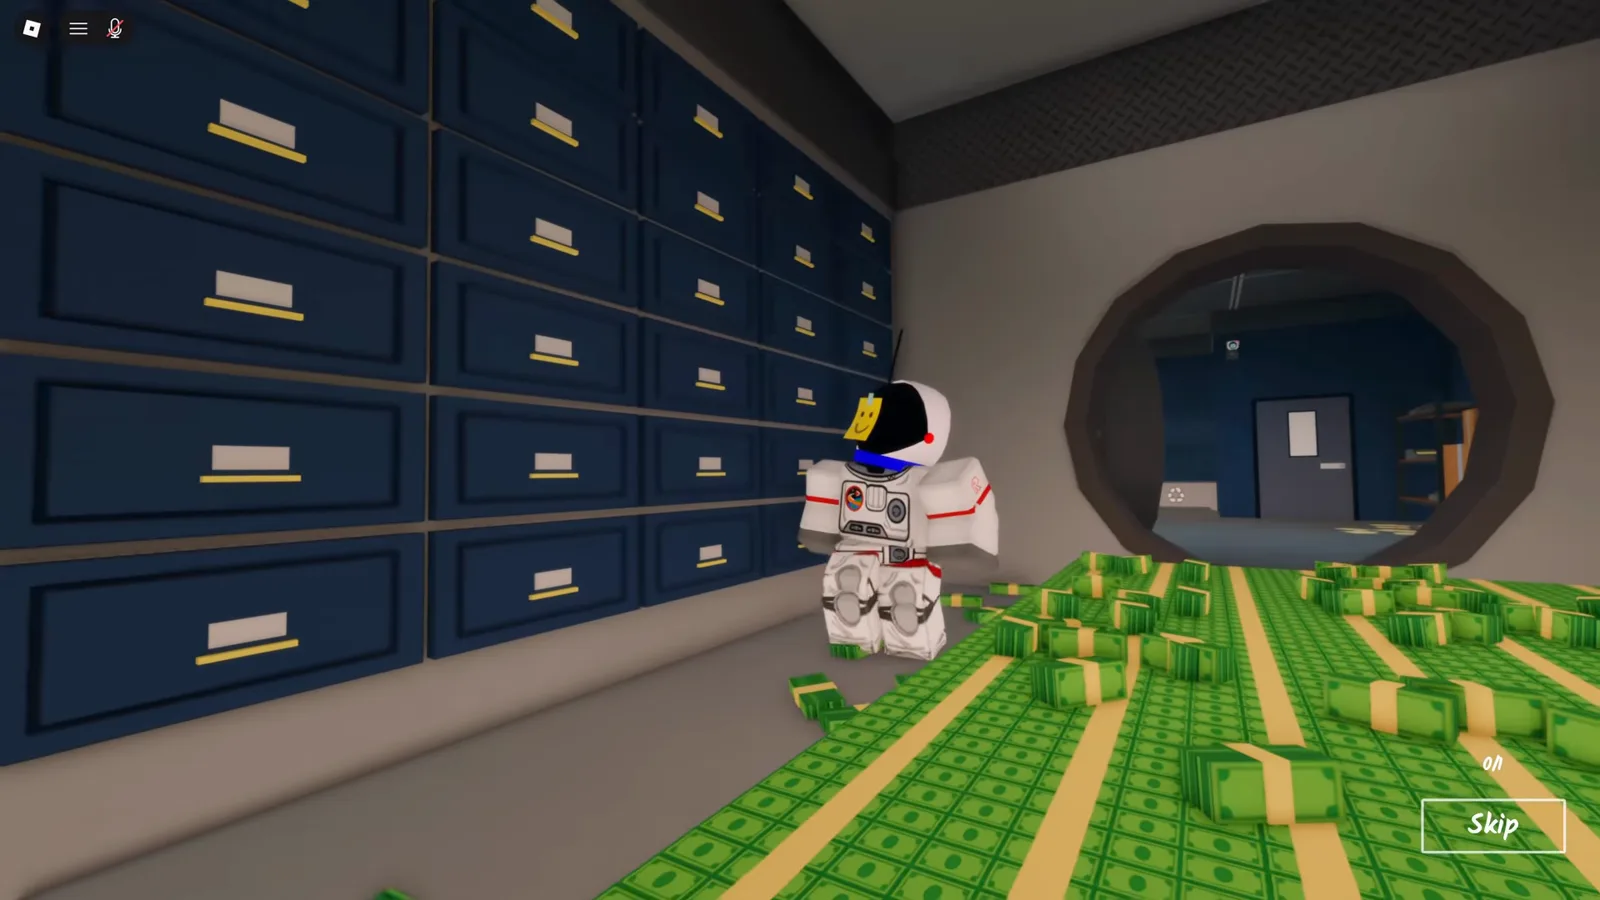
Inside the vault: deposit boxes and a lot of cash.Watch at 37:28 - 13
Read the whiteboard — the boss's to-do list
The vault's whiteboard is the lore payload: "TAKE CARE OF THE ROGUE SCIENTIST / WASTE MORE PAPER / WASTE EVEN MORE PAPER! / FIGURE OUT HOW TO CONTROL THE WEIRD PEOPLE IN SUITS / THE SUIT PEOPLE SCARE ME / INSTRUCT ALL EMPLOYEES TO NOT GO INTO THE NEXT ROOM." The shredder cover-up goes higher than your boss.
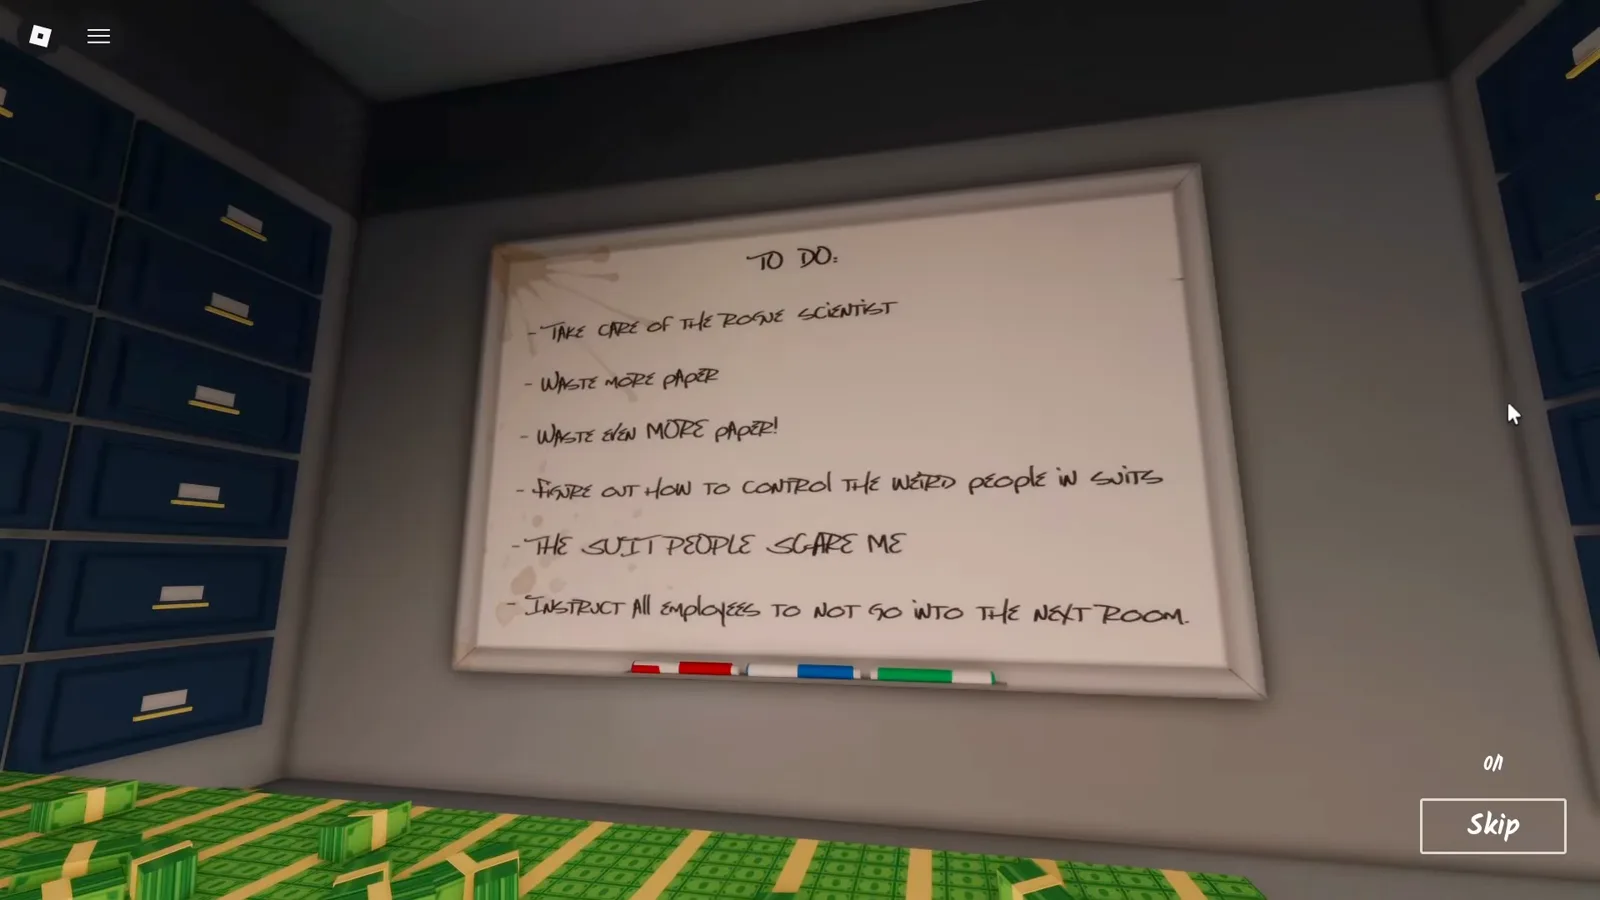
The to-do list: rogue scientist, suit people, and the next room.Watch at 9:20 - 14
Escape on the OVERVIEW - ENDING 3 screen
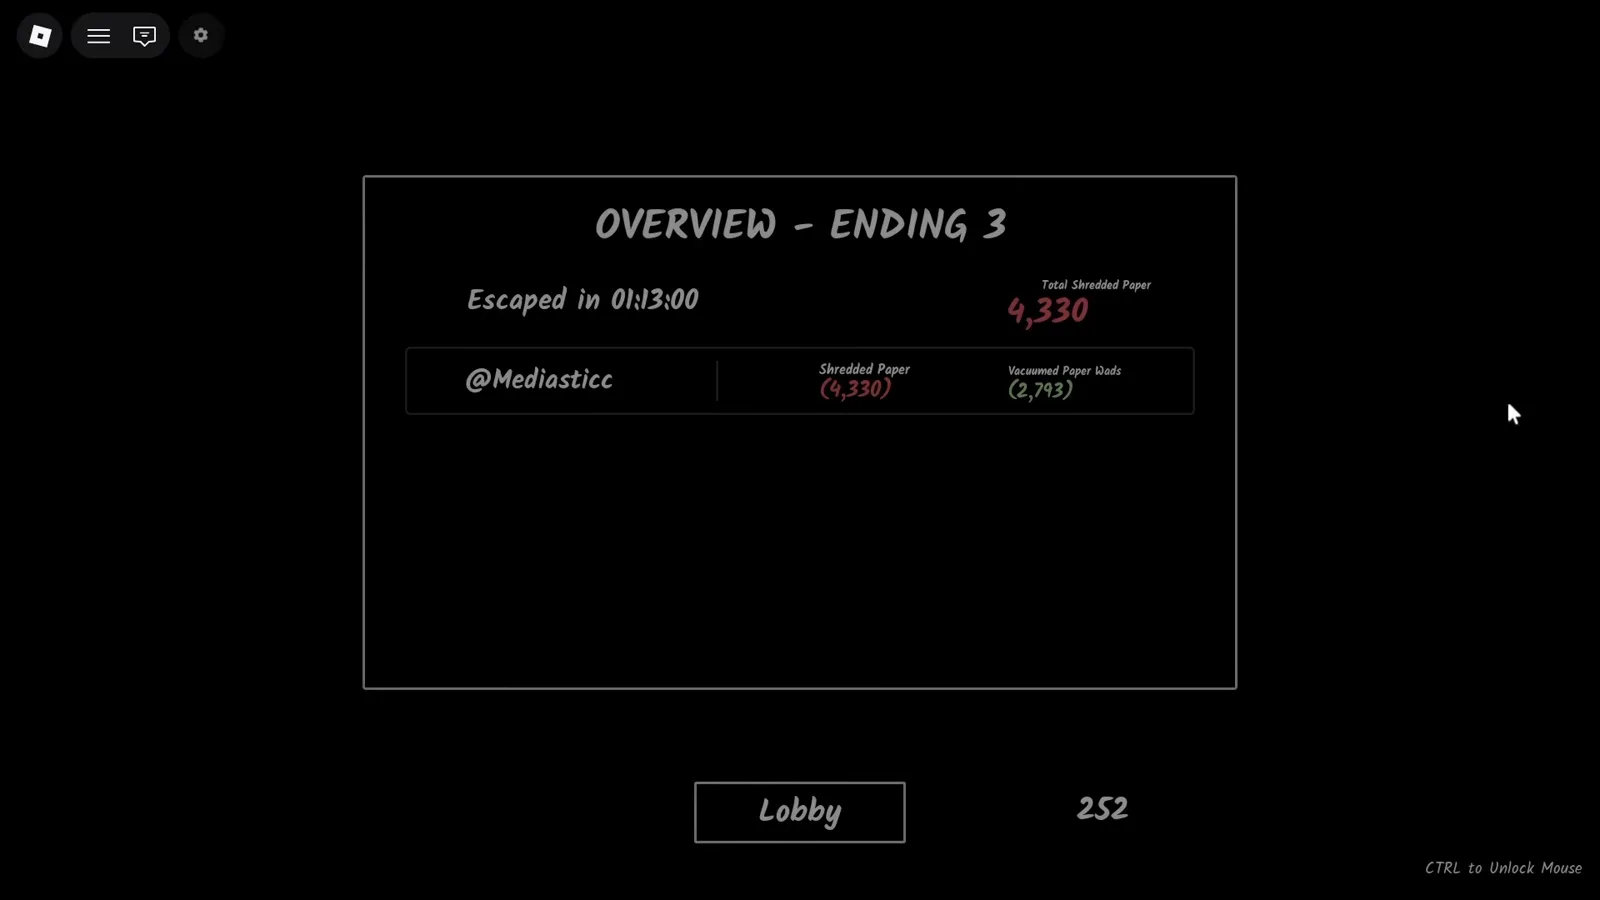
The run closes on the OVERVIEW - ENDING 3 results screen with your escape time, shredded paper total and paperclip payout — the source run escaped in 01:13:00 and banked 252 paperclips. Ending 3 complete.
OVERVIEW - ENDING 3: escaped in 1:13:00, 252 paperclips.Watch at 9:33
FAQ
What is Ending 3 called in Shred the Secrets?
Whistleblower. The official badge is named "Whistleblower (Ending 3)" with the description "Complete Ending 3," and it is earned by 4.9% of players.
How many rooms does Shred the Secrets have now?
Twelve. The [ENDING 3] update extended the run from 8 rooms to 12 — the new Rooms 9-12 hold the attic, the testing lab, the Mesa Corp offices and the bank vault, with money goals up to $5,000,000 per room.
How do I open the vault in Room 12?
Interact with the vault door and play the dial minigame: four turns, shown as TURN 1/4 through TURN 4/4. The combination is written on a note in the room — each number tells you the order of a turn, and its arrow tells you which direction to turn. Press SPACE if you want to back out.
What does the Mad Scientist quest reward?
The Industrial Revolution badge ("Complete the Mad Scientist Quest"), earned by 3.4% of players. Find his blueprints on the lower floors and bring them back to the attic.
Can I get Ending 3 solo?
Yes. The source run on this page was a solo clear (1:13:00). A squad still helps — the $5M-per-room goals go much faster with the Golden Shredder and split roles.
What is the whiteboard in the vault?
The boss's to-do list — the lore reveal of Ending 3. It reads: take care of the rogue scientist, waste more paper, figure out how to control the weird people in suits ("THE SUIT PEOPLE SCARE ME"), and instruct all employees to not go into the next room.
Is there a code to open the vault in Room 12?
No. The Room 12 dial has no fixed code — the combination is written on the orange notes around the room (number = turn order, arrow = direction) and it changes every run. Recorded runs show different combinations across sessions, so read your own room's notes instead of copying a video.
Where is the attic in Shred the Secrets?
The attic sits above Room 9, the green-lit room with the yellow catwalk on the Ending 3 route. You open it by collecting the missing ladder parts in Room 9 and repairing the broken ladder — the game announces "The attic has been opened" once it is fixed. The Mad Scientist (PROJECT: CAFFEINE) waits upstairs.
Related pages
- Industrial Revolution badge — Mad Scientist quest, all 3 blueprint locations and the Handheld Shredder reward
- All 3 endings overview — What?, Dark Secrets and Whistleblower badge requirements
- Whistleblower badge guide — the Ending 3 badge route frame by frame: ladder repair, Mad Scientist quest, vault dial
- Room 12 guide — the vault room itself: quota, dial UX and what the vault reveals, frame by frame
- Ending 1 & 2 walkthroughs — hidden buttons and basement route
- Secrets & collectibles — golden shredder, phone, fake exit and more
- Updates — the [ENDING 3] patch breakdown (12 rooms, July 30)
Related guides
- Shred the Secrets Money Guide: $1M Strategy, Upgrade Order & 2X Cash Pass ROI
- Shred the Secrets Beginner Guide: Best Tips, Upgrade Order & Squad Strategy
- Shred the Secrets: All Endings Guide (Ending 1, 2 & 3)
- Shred the Secrets Walkthrough: All 12 Rooms, Phone Location & All Endings
- Shred the Secrets: All 30 Badges Guide — Official Earn Rates (2026)
- How to Play Shred the Secrets: Beginner's Guide (Core Loop, Upgrades & Co-op)
- Shred the Secrets Upgrades Guide: Best Upgrade Order (Solo, Squad & Speedrun)
- Shred the Secrets Classes Guide: All 6 Classes & Paperclip Farming
- Shred the Secrets: How to Beat the Game Fast (Buzzer Beater Guide)